Showing posts with label I Am So Creative. Show all posts

Friday, December 29, 2017

A Pea Gravel Patio!

When we tore off the decks to add the basement, I told Paul that rather than build the huge wraparound deck that we had previously, I wanted to replace the deck outside each door, but build a patio between them.
I'm not sure he quite agreed with me, but he designed and built two beautiful decks.

We laid gravel with plans to pour concrete within a year.
Well..... 3 years later.....  It still looked the same.  Part was due to finances - concrete is a lot more expensive than it was 10 years ago when we installed our sidewalk!  But a lot was due to indecisiveness.....  Neither of us wanted a square chunk of gray concrete.  But flagstones, staining, texturing - all added to the cost!
And then I read an article online that said you can use pea gravel as an affordable alternative to concrete.  Just that; no pictures, links, or anything.
So I tore the internet apart trying to find inspiration.  I did find a couple of blogs that made very basic, very tiny patios using pea gravel.  But I couldn't find any ideas that we could use on our space.  So I imagined, talked to Paul, did some price checking, and then.... We started work.


We leveled the area and used 5x5 timbers to frame it, secured to the ground with re-bar pounded through drilled holes.

We laid down landscape fabric (on the windiest week in April, I think!) to keep the weeds from sprouting through the gravel.

Slave labor.  11 tons moved in 3 hours.
View from the corner by the house and back deck.  I'm standing in the flowerbed we designed to edge it on 2 sides (against the house).
I decided I wanted a solid transition from the stairs to the patio (not to mention it was a giant step down!)  I had slightly under-estimated the amount of gravel needed, also, so we laid rocks at the base of both sets of stairs that served both purposes - solid landing, plus several square yards worth of filler!
 

I love how the "transition area" turned out.


Paul used leftover rock to outline our tiny bit of grass in the front, making it look very nice an tidy.

I priced patio furniture, and decided we couldn't afford it - at least not the style I wanted.  Paul took some measurements and built us some!  Here we have the first couch he built and the 2 cushions that actually did arrive with the "free 2 day shipping."

And this is the finished project!  We had to wait to stain it because the lumber was still very wet. 
(And it's a good thing we did, or the hail would have destroyed it!)

Add some flowers for perfection!
The purple cow is an ongoing family joke.  We confused the heck out of one of my dad's milk route drivers when we were young, by leaving a note for him on the fuel tank (just for randomness sake):
I never saw a purple cow.
I never hope to see one.
But I can tell you, anyhow:
I'd rather see than be one!

I don't have a completed completion photo of all the deck furniture Paul built, with the flowers growing in the beds (actually, cabbage and kale, as the flowers were destroyed by hail).  Paul built us two full-length couches, a loveseat, chair, and footrest table for our outdoor oasis - all matching, and sized for standard "deep seating" patio cushions.
Despite not having a photo inspiration, the whole area turned out exactly how I had imagined.  It is the perfect place to relax in the evening, and has plenty of seating for all of our large family, plus guests.

The only drawback is that we got cats about the same time as we made the patio.  And they like to dig and....you know.  So there is that consideration if you are interested in tackling a gravel patio as your own project.

Thursday, March 9, 2017

Bedroom Makeover, Continued

Do you remember when we moved the bed into the closet?
  Well, that was three years ago. Basically, nothing in our room has changed.
We filled the shelves with junk. (All of the "grown up" - can't say "adult" - DVDs, CDs, and Xbox games got moved in and away from children.) I got a new bed spread a year ago. I added a few second-hand pillows that I was tired of the kids taking outside.
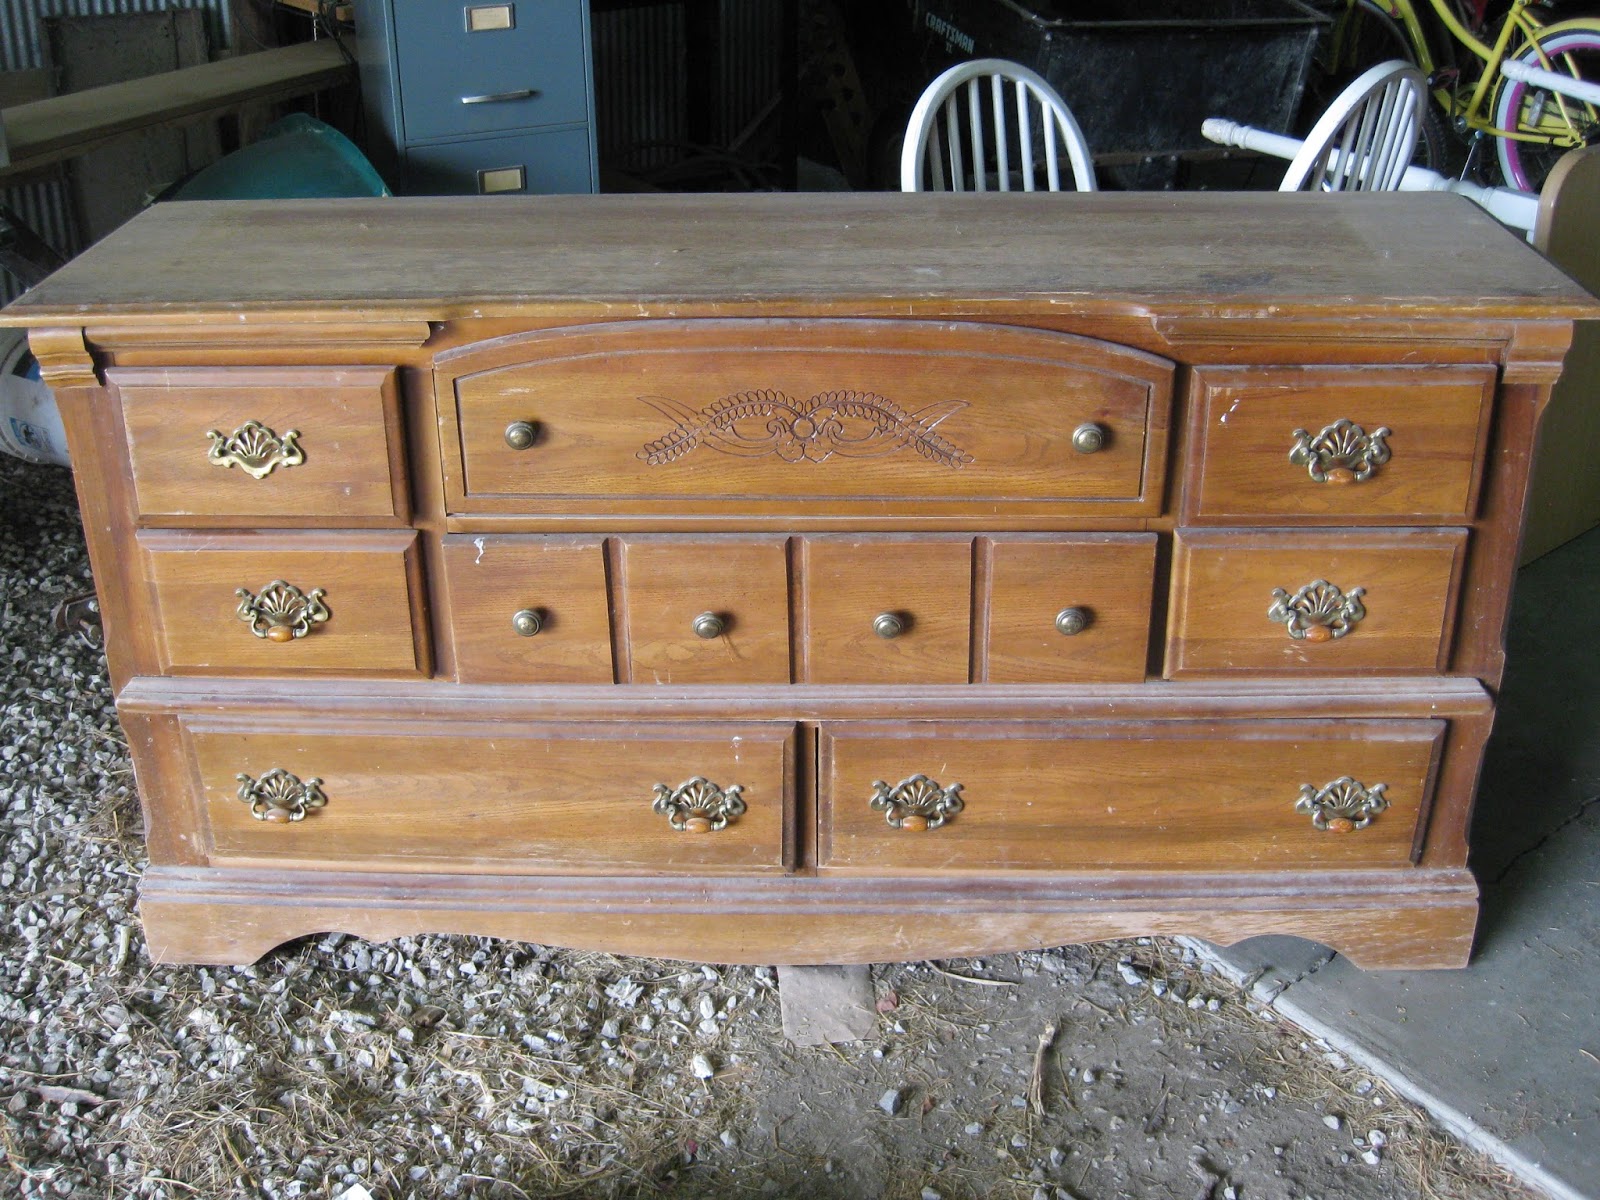
Let's see...... What did I say I was going to do "soon" in that post? Hmmm...... Refinish a dresser. (It's still sitting in the shop.) And add some art over the bed.
Well, after 3 years, I can finally say that I've gotten the art for over the bed. And I love it!
I was in Hobby Lobby last weekend picking up some stuff for our Awana Grand Prix. I walked by the wall plaque and it caught my eye. It is the verse we put on our wedding invitations and programs. (So true for our feelings for each other - then and now!) I made a note to mention it to Paul, but didn't get it.
I looked it up online a few days later, and saw it was on sale for half price. So it was only $15! I wanted to pick up a shelf, to give the wall the feel of a headboard, since we don't have one. This one was 40% off, so I paid $30 for it. (Which some would say was too much given the level of distressing it's received.) But the colors matched our quilt, and I loved the rustic look.
The items on the shelf are all from "shopping the house." I'm constantly moving things around.
I've found out takes me quite some time to get used to the feel and function of a room before I know how I want to decorate it. (It's taken me 10 years to figure out "my" decor style.) Then it comes down to time and money, both of which I'm usually short of.
But sometimes, it's worth the wait. I am so pleased with how this project turned out! (Even if trying to level that shelf had me wanting to scream!)

Tuesday, August 30, 2016

Faux Antique Bread Box

(This post is over a year old.  I have no idea why I didn't post it when I typed it up.)
For several months, I've been contemplating the purchase of a bread box.  I trolled Amazon for a style that would fit two loaves of bread.  (We have to buy loaves two by two, as one round of PB&J's will wipe out a half a loaf.)  I found one that kind of sounded like it would fit the bill, and was in my price range ($20), but wasn't convinced enough to order it right away.
After buying bread yet again, and having the mess of new loaves, a partial leftover loaf, plus various homemade items laying in the "bread area" (invariably, one of the children lays something heavy on the loaves of bread, or decides to climb on the counter and puts a knee into it.), I decided.... It was time.
Time to build one.
I had seen these on Amazon, but besides the $100 price, the reviews on how big they were dissuaded me.  It didn't seem like we needed all that space.  But looking at the mess on the counter, I thought.  Yep.  We'll use it.
Call in the talent.  (I could do a lot of these things myself, it's just faster to let him. ;) )
I gave Paul the picture I printed off.  He made some notes and went to work.  And this is how it turned out:
Hand-punched tin (made out of salvaged tin from our old return-air vent). 

I did a punched-tin project once in high school and figured I'd try it again.  I googled patterns, printed it out, and taped it on.  This one was supposed to be the practice run, but I was quite happy with how it turned out!  It took maybe 2-3 hours after all the mommy interruptions.

It really does fit a lot of bread!  In this pic, there is two brand-new loaves of sandwich bread (longer loaves), another half loaf, a couple hamburger buns, and some leftover biscuits.  Fits perfectly!  And looks so pretty and neat all closed up.


Total Cost:  $6
Wood:  scraps laying around
Nails:  on hand
Tin:  scrap
Stain:  on hand
Knob:  $1 (for 2-pack)
Hinges:  $5

Much better than the $100 price tag for the one on Amazon.  And we [could have] got it done faster than waiting for shipping.

Monday, January 19, 2015

Laundry Basket Dresser

My mom sent me a link to this picture of what is apparently called a "laundry dresser" back last summer.  She knows my disdain for laundry.  (Which, ironically, I am not folding in lieu of writing this blog.)


I liked the look of it, but I didn't like the idea of having to pull out baskets to sort each thing when I am sorting dirty clothes for wash.  I just toss.  It seemed like a way to make it prettier, but more complicated.
I did know that for our new laundry room, I wanted a laundry basket for each kid.  I had discovered that sorting a massive pile of clean laundry into baskets for each person makes folding go 10x faster - you're only folding one person's clothes at a time, so no more having 15 stacks around you while you fold.  I got a couple more square baskets and for two months, I sorted clothes into the baskets..... Which stayed parked in front of the freezers.  (I did fold them occasionally.)  One basket for Nathan, one for Jacob, one for Zadie, one for Gideon, one for Paul and I, and one for towels.
That takes up a lot of floor space, folks.  
Right before Thanksgiving, I couldn't take it any more.  Light bulb!  That laundry stacker...... for clean clothes!  Paul was going to the lumber store, and I made a list.


It fits perfectly in the little niche of space between the freezers and the spiral staircase!
I don't do step-by-step how-to's with photos.  Basically, my process was measure my basket, allow two inches clearance for each basket, plus two inches off the floor.  We built each side (looked like a ladder), then set a basket on it and measured to determine how far apart and how much wiggle room to leave for the handles.
I used 2x4s for the legs, and 2x2s for the handles.  We put a couple 2x4 braces across the back and across the floor, and then topped it with 1x6s.
(If you are thinking about taking on the project and know anyone even minorly handy, have them take a quick look at the photos and it should be enough to figure it out.)


I actually did most of this project.  I designed it, but I had Paul double-check my calculations and make the shopping list.  I did the cuts, although he had to re-do a couple cuts for me (they were millimeters off, but enough to wobble).  I made him do all the screws, because I would have taken entirely too long with my over-analyzing each move.  I wanted to get it done the same day. :)  Then I stained the whole thing and put it to work!  (In retrospect, staining before assembling would have been MUCH easier.)
It's not making me any better at folding clothes, but it does keep them organized in a way that the kids can find them.  They pull out their basket, dig around, and put it back (usually).  When they were all lined up on the floor, they'd pull them out of their basket and toss them into the ones next to it.  And it takes up a quarter of the floor spaces as my laundry basket parade!
So there's my laundry dresser!  Pinterest project, minus the Pinterest account. :)

Sunday, December 21, 2014

Home Improvements 2014: Staining a Concrete Floor

We've received lots of compliments about the basement floor.  I promised I'd document the process later, so here it is.
I researched and researched (Google and I have gotten pretty intimate over the last 6 months) on options for the floor, and came up with concrete staining as my choice.  I knew I didn't want paint, and tile was going to be a huge job.  I really liked the look of stained and sealed concrete.
I called a decorative concrete company in the area to get an estimate.  With a quote of $4-6.50 per square foot (1000 sqft basement = at least $4000!), we decided we'd try to do the work ourselves.
There are two types of stain:  acid stain and water-based stain.  I didn't want the acid stain because I didn't want fumes or chemical burns on any of the kids.  (I don't know if that would be possible, but didn't want to risk it.)  I finally found some Eagle Brand stain on Home Depot's website, so when we were in the store, I asked an associate about it, and got a big ol' "Uhhhhh........"  They sent me home with info on Behr's concrete stain, which had horrible reviews, so that was out.
Paul mentioned what we wanted to do to the men that did the surface finish when the floor was poured.  Mr. Mages directed Paul to Carter-Waters in Olathe - and I'm so glad he did!  It was exactly what I'd been searching the internet for - in a real walk-in store!  Concrete finishes is kind of the niche market these guys apparently have found, so they know about all of their products, could answer any questions, printed off fact sheets and application instructions, and sent me home with exact pricings.  So helpful! They recommended Elements Stain by Butterfield Color. All that was left was to choose a color.....
Which is where the stress began.
I'm a pansy when it comes to color!  (Which is why all but one room of our main floor remains white.)  I wanted to play it safe, and go with boring brown (everything goes with brown!), but Paul wanted something with a little character.
Let's just say the color chart is not true to real life color.  
But we'll get back to that in a moment.
One of the things that is recommended in every do-it-yourself concrete staining tutorial is grinding the concrete with an industrial floor buffer that has grinding pads, to remove any residues or imperfections.  I totally did not want to do this.  Time, mess, etc.  And I'm just generally cheap and lazy.  So, I asked the guys at Carter Waters, and they said nope, we didn't need to worry about that as long as the finishers didn't use a curing agent or sealer when they troweled the surface.  Ding!  No problem.  So we got to skip that step since the concrete was brand-new.
The stain instructions said that cleaning with Cho cleaner was required prior to putting down the stain.  It's a slightly acidic cleaner that strips the concrete and opens up the substrate to absorb the stain.  One 5-lb bucket of powder made 5 gallons of cleaner.  


We looked at the expanse of concrete and decided that wasn't going to work.  So we wet down the entire floor prior to putting on the cleaner, to keep it all from soaking in in the first room.
So......Wet the floors.

Just ignore the attractiveness of me in my nastiest clothes.  So flattering.
Splash on the cleaner.

Scrub with a push broom.  (I didn't get too serious with the scrubbing.)
Quickly neutralize the acid of the cleaner with baking soda water.  Wet vac up the excess water.
Rinse.  And wet vac again.
Lots of water in these first steps!  And wet vacuming is maddeningly slow with a Shop Vac.  I don't know if there's an industrial-sized vacuum you could rent for this, but it may be worth it.
(Sorry I don't have pictures for each step, but when we work on a project, I'm more focused on getting it done than I am photos for D-I-Y tutorials.)
Then let it dry........  Don't rush this.  I think we did.  The concrete looked dry, but I think that below the surface there was still moisture.  (If we were doing it again, I'd wait a full 24 hours for drying, rather than 6-8 that we did.)  


Then comes the fun part!  Putting on the color!
Okay, so back to the color dilemma......
We didn't really discuss our color ideas prior to going to the store, so to avoid a public scene, I let Paul make the decision.  He asked the associate's opinion, and went with that.  So, the name of the color is "Weathered Bronze."  Envision what you think that should look like.
And then feast your eyes on reality:


More like "Weathered Mustard Mixed with Cow Manure."  Thank goodness we did a test patch.
I could tell Paul wasn't thrilled with the color, but I'm not sure he wanted to admit it.  After two days of looking at our sample patch, I finally told him I couldn't do it.  I didn't want to cringe every time I walked down the stairs.  
So back to the Butterfield Color site I went.  I pored over their gallery photos, and finally came up with a look that we both liked.  Unfortunately, they don't say what the colors are on the photos, so we had to guess.  We decided to go with "Cordovan Leather" and layer over a darker brown to take some of the red out.
In Paul's defense, my "boring brown" (Kona Brown) wasn't that great either.  It looked like a big coffee stain on the floor.


You mix the stain with water.  One quart of stain base makes one gallon of stain.  
The stain is supposed to be applied with a "high pressure low volume" sprayer.  Our local rental store didn't have one to rent, so we went to Home Depot to buy one.  However, we got a "high volume low pressure" sprayer on accident.  The difference of pressure is not that great, but the difference of application is.  The HVLP that we got sprays bigger drops (think cheap spray bottle), whereas the HPLV is more of a fine mist.  (Both of these attach to an air compressor.)

Safety first!
The application with the sprayer went surprisingly fast.  You just do overlapping circular motions so there are no lines, and just go-go-go!  (You can't let it form dry lines.)  One of us would spray, and the other would be ready with the stain to refill the canister.


The specs say one quart of base (gallon prepared) will cover 200-400 feet.  The men in the store said easily would do the whole 980.  It was actually somewhere in the middle, with it covering about 2/3 of the floor.  In the boys' room we had to use the weathered bronze, but with the dark brown layered over, it didn't end up too bad.  (We went and bought the correct type of sprayer for the second coat.)


Added to the fact we were applying the stain more heavily than intended, was the fact that I think our concrete wasn't fully dry.  This resulted in some puddling.  Which had me upset initially, but after it was finished, added character and dimension to the effect.


And then it was wait nervously for it to dry to see if we'd like the end result.
We did do a very light second coat of the Kona Brown over the red (Cordovan Leather) to kind of tone down the red.  I honestly don't think it made that much difference, but we had the brown to use, so - hey.  Nothing wasted.


The stain's data sheet recommended a certain seal over it, but the men at Carter Waters said that wasn't necessary, and sent us home with a wax.  You mop it on with a microfiber pad, then let it dry.  To get the glossy look, we rented a floor buffer.


The instructions said two coats of wax.  It took about 6.  The wax was just soaking into the concrete, so when we buffed, it wasn't shining, and I was getting frustrated.  So finally, I just glugged a bunch out and then spread it so it was still white on the floor, and let it dry.  Then I took the buffer to it, and - instant shine!

The dark spots are where the puddles were.  Prior to the wax, the puddles were glossy, and the rest was matte, but waxing it put the same gloss over all the floor and made the "puddles" look more like marbling.


We're so pleased with the result!  It wasn't really that hard, just a lot of time.  Total cost, including 3 quarts of base, the cleaner, and the wax, buying two sprayers, and renting the buffer, was about $400.  That's a tenth of the quoted cost of having someone else do it.  I'm thinking maybe we need to start up a side business!
These last two are a super-close up of the texture and coloring..... And also a super-close up of the creepies that invaded this fall.  I swept multiple times a day and would collect at least a dozen of these each time.  I sprayed Home Defense around the perimeter of the basement (per the instructions) and the outside foundation.  It wasn't until I sprayed up along the top of the foundation from the inside that I noticed a difference, but they weren't entirely eradicated until our first hard freeze followed by a long cold spell.

Gross, gross, gross.
Here you can see the speckles of dark brown over the red.

And the creepiest thing is they "crunch" when you squish them.  Worms are not supposed to "crunch."  I was terrified to walk barefoot down there.
However, I love the "crackle" look that the stain took in some areas, like this.

Friday, December 19, 2014

The 60-Second Pick Up!

Earlier this week, by a stroke of inspiration, I came up with a kids cleaning idea that may change my life.  Definitely my house!
I was sitting on the couch, and getting frustrated at the "kid-clutter" all over the floor - shoes, socks, dirty clothes, toys.... you get the picture.  The kids were running back and forth, chasing each other, so I hollered out, "Boys!  Get in here.  We're going to take 60 seconds and pick up this room."  So I started counting.....  It definitely wasn't just 60 seconds, as I stopped to instruct, "26.....  27...... That goes in the bathroom.  In the hamper not on the floor!...... 28..... Put those on the back porch.  Hang them up....... 29....."  But they really jumped on it, racing to see if they could get it picked up before I got done counting.  I was so pleased with the result that I gave both boys a dollar when they were done.  (I never give monetary rewards - I'm too tight!)
I've employed it at least once daily since then.  (No payouts these times though.)  Nathan has caught on that it's not exactly a game, so he doesn't race any more - he can't seem too eager to please! - but at least he still contributes without arguing. We've used it on the living room, the front room, the dining room, and the back porch.  Tomorrow I'm going to see how it goes for the bathroom.
I think the reason it works so well is that they know they only have to clean until I reach 60, so it's not an open-ended task.  As soon as we reach 60, they get to go back to playing, and Mommy is happy.
And when Mommy is happy, everybody is happy. :)

Sunday, November 9, 2014

New Look

I've been thinking about a new title for the blog for quite some time, but have lacked inspiration and motivation.  I finally came up with a title I liked, but needed a picture.  Well........I ended up having a camera while at my parents', and got a picture that went along with my theme.
Whereas I will still be blogging about plenty of "Mommy" stuff, I don't feel like I fit the title of "New Mommy" anymore.  Something will always be new in the journey of motherhood, but after 4 kids, I don't think I qualify as a new mom. :)
So welcome to "Chipped China" - my [continued] blog about our imperfect, every-day stuff.


Wednesday, June 25, 2014

One Hour Yeast Rolls

Have you ever been making a meal, and thought, "Ohhh.  This would be perfect with some rolls?"  But of course when you think that, there's only an hour left 'til your guests get there, and the dining room table is buried under a pile of crap a foot deep, so there's no time to make bread or even go to the store.
Or maybe that's just me.
One good thing about the whole Facebook/Pinterest thing is that there are lots of recipes getting shared.  I have bookmarked a lot, but how often do people actually try these things? 
Well, I did for once.
After a bit of tweaking (because I can always do better than an original :) ), I think this one is a keeper:

ONE HOUR YEAST ROLLS
makes 24 small rolls or 18 normal-sized

1 c warm water
1/2 c sugar
1/3 c oil
2 heaping tbsp yeast
1 tsp salt
1 egg, beaten
3 1/3 c flour

Mix together warm water, sugar, oil, and yeast.  Let stand for 15 minutes until bubbly.  (I do all of this with my stand mixer, but you can also do it in a regular large mixing bowl with just a wooden spoon.)
Stir in salt and beaten egg to yeast mixture.
Gradually add flour.  Dough will be kind of sticky, but add enough flour til it's manageable.  Cover with a towel and let rest in bowl for 10 minutes.
Oil hands and form dough into balls.  Place on a greased baking sheet so they are not touching.  Cover and let rise 20 minutes more.  (They will rise not quite double, and rise even more during baking, so make sure your sheet is big enough!)
Bake at 350 for 10-12 minutes, or until tops are golden.
Brush tops with melted butter, or butter/honey mixture (1:1 makes a nice sweet roll).

This is a super easy recipe, and even someone who says, "I'm not sure I can bake breads," could do it.  And what better way to learn, than to just dive in!
And I haven't tried it, but after making a double batch last night, and making them jumbo-sized, I'm pretty sure they could make a tasty hamburger bun as well!

Wednesday, June 18, 2014

Refinished Wardrobe: Blonde to Brunette

I finally finished the wardrobe!  I am beyond excited about how it turned out.  I may or may not show off pictures to anyone, anywhere.  Eek!
Let me start off by saying I have never stained or done woodwork of any type.  (I have painted a couple pieces.)  I have observed Paul or his dad or grandpa working on projects, but even that exposure has been limited.  And I chose this project as a trial run.  Heh.  Nothing like taking on something small to see if I can do something!
And I am going to point out that Paul didn't help with this project.  At all.  I asked him later, after I was finished, why that was.  I didn't know if he was being a jerk, or being like a good parent - standing back and making me do it on my own.  He said it was more of a matter of he had no idea what I was envisioning, so he just let me do my thing.
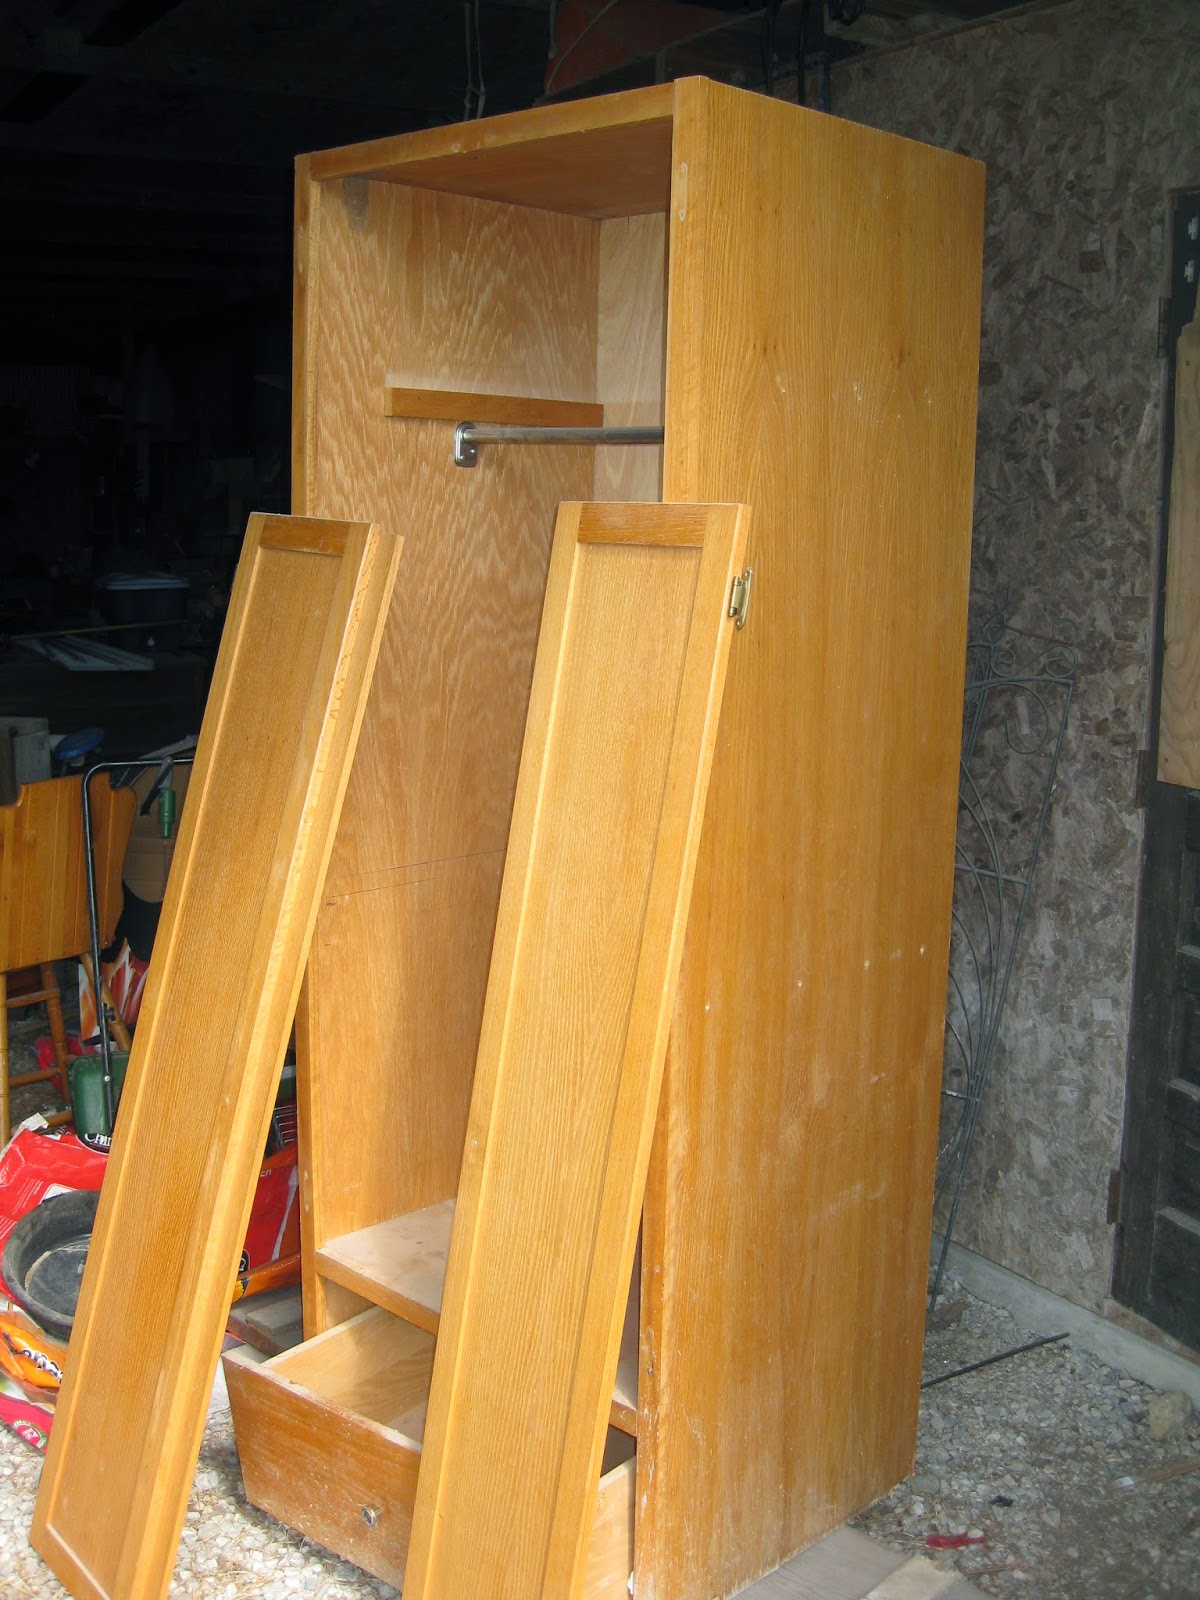
So, the history of this piece, is that a neighbor/friend of my parents' custom built it for my older sister's room, I'm going to guess about 1995.  Mom said they told him the measurements they needed, and the price they could pay, and this is what he built.  I have no idea what it's made out of - I'm assuming maple or pine.  The doors are solid, but the sides are a veneered particleboard.
I was so gung-ho to get the project started, I forgot to take good "before" pictured until after I had started dismantling it.

My sister had later added an interior shelf (note the screw holes) and exterior hooks.  (I had already removed them at this point.) 


The backing had come loose almost completely.
(I guess Paul did help out on this:  he nailed it back on with finishing nails right before we moved it into the final place in our room.)

There was some water damage along the bottom.  I didn't worry about this too much, because I knew it could be covered with a piece of trim.


I didn't take a lot of pictures of the process.  For one, snoring boring for you if this isn't your thing.  For two, I was "in the zone" and focused on getting it done.  (Babies only nap so long!)
I patched the screw and hook holes with wood putty.  Then, I sanded it.  I wasn’t positive how much to sand, because the finish was so close to a natural color, it was hard to tell when you were to bare wood.  So I sanded it twice with an electric sander (100 grit), and once by hand. (220 grit)  (Who knew:  sanding can make you SORE!)  Some places I sanded less (like once by hand), since I knew they wouldn’t show behind the doors.  And it turns out they accepted the stain just as well, which makes me question the necessity of sanding to bare wood, but anyways…..
I did use a pre-stain conditioner.  I don't know if that's really necessary, but it was recommended, and I figured I needed all the help I could get!
I used Minwax gel stain in “Hickory.”  Gel was recommended since it would be stained while standing up (drip hazard).  It had good reviews, but I did have some trouble with it gumming up.  It still felt a bit tacky in a couple spots, even after two days between coats.  (I only did two coats.)  It may be because the temperature was around 90, with typical Kansas humidity, when I was doing this.  When I tried to rub off the excess stain, the lint (in what I thought was a lint-free rag!) got stuck in it, especially at the end of the pieces.  This really stressed me out, and I read up on what to do, and everything said “don’t sand after staining!”  Normally, I’m a follow-the-rules kind of gal, but I followed my gut instinct and… I sanded it.  I used a really fine steel wool, and it wasn’t sanding, so much as petting those areas with the stuck-in lint. It seemed to knock out the lint fibers and felt much smoother prior to adding the clear coat.
I used Minwax Semi-Gloss Polyurethane for the clear coat.  I used 000 steel wool between coats, and buffed it down good (because this is what Google said to do!).  The can recommend three coats, but I only did two.  It's not like a kitchen cabinet, that would get lots of use and abuse!

This is when I started to get excited - nigh unto giddy.  All that was left was the trim board between the doors.
Now.... What to use for hardware?  I knew I didn't want the tacky brass that had been on it. So, now... Buy all new, or.... Spray paint?

Original brass, "Oil Rubbed Bronze" (left), and "Anodized Bronze" (right, which I already had).

Oil Rubbed Bronze is the winner!  And I think I'm going to leave the screws.  I kind of like the contrast.  Weird, considering I'm OCD.  But I'm also lazy, and painting those things?  No thanks.


I knew I wanted a cup pull for the drawer.  I had to go to 3 hardware stores in town to find one that had any, and of course they only had it in silver.  But I was not going out of town to hunt for this one thing.  Another reason I decided to spray-paint the hinges and knobs - ensuring everything matched!

I did this little trick I saw somewhere online - photo copied the screw holes and used the paper as a guide - worked perfectly!


My photography, however, leaves a lot to be desired.......


 And the final result:

Love, love, LOVE!


Obviously, this is Paul's "closet."


The staining is slightly uneven, but I think it gives is a rustic, antiqued look.  There are imperfections.  But it’s things that only would bother me, and it turns out, I am not even really bothered by them, in my love for the overall result.
The knobs don't exactly match.  And I messed up the finish on one because it apparently wasn't quite dry when I installed it.  And the holes aren't even.  (That last one is not my fault.  Pre-existing condition.)

I wasn't really that careful on the interior.


The unfinished wood shows at the bottom under the drawer.

But the water damage does not!  No trim needed.
So, once more.....
BEFORE:

And..... AFTER:


Love!  For someone who had absolutely no idea how to do this type of stuff..... I thought it turned out pretty dang good!  I thank Google for my education. :)

Total cost:
Wardrobe:  free
Wood conditioner:  $12 (barely used any)
Stain:  $12 (used half a quart)
Polyurethane:  $33 (used maybe 1/8 gallon)
Drawer pull:  $7
Spray paint: $7 (again, hardly used any)
TOTAL:  $67 - Not bad at all!


Now I can't wait to get started on my next project.......