Understanding you is like trying to learn the English language: There's the rules, but there's all these exceptions to the rules.....
-Paul
Yes, I'll admit, it's true. It's a good thing that I'm not touchy about him reminding me of these types of things.

Saturday, June 28, 2014
Wednesday, June 25, 2014
One Hour Yeast Rolls
Have you ever been making a meal, and thought, "Ohhh. This would be perfect with some rolls?" But of course when you think that, there's only an hour left 'til your guests get there, and the dining room table is buried under a pile of crap a foot deep, so there's no time to make bread or even go to the store.
Or maybe that's just me.
One good thing about the whole Facebook/Pinterest thing is that there are lots of recipes getting shared. I have bookmarked a lot, but how often do people actually try these things?
Well, I did for once.
After a bit of tweaking (because I can always do better than an original :) ), I think this one is a keeper:
ONE HOUR YEAST ROLLS
makes 24 small rolls or 18 normal-sized
1 c warm water
1/2 c sugar
1/3 c oil
2 heaping tbsp yeast
1 tsp salt
1 egg, beaten
3 1/3 c flour
Mix together warm water, sugar, oil, and yeast. Let stand for 15 minutes until bubbly. (I do all of this with my stand mixer, but you can also do it in a regular large mixing bowl with just a wooden spoon.)
Stir in salt and beaten egg to yeast mixture.
Gradually add flour. Dough will be kind of sticky, but add enough flour til it's manageable. Cover with a towel and let rest in bowl for 10 minutes.
Oil hands and form dough into balls. Place on a greased baking sheet so they are not touching. Cover and let rise 20 minutes more. (They will rise not quite double, and rise even more during baking, so make sure your sheet is big enough!)
Bake at 350 for 10-12 minutes, or until tops are golden.
Brush tops with melted butter, or butter/honey mixture (1:1 makes a nice sweet roll).
This is a super easy recipe, and even someone who says, "I'm not sure I can bake breads," could do it. And what better way to learn, than to just dive in!
And I haven't tried it, but after making a double batch last night, and making them jumbo-sized, I'm pretty sure they could make a tasty hamburger bun as well!
Wednesday, June 18, 2014
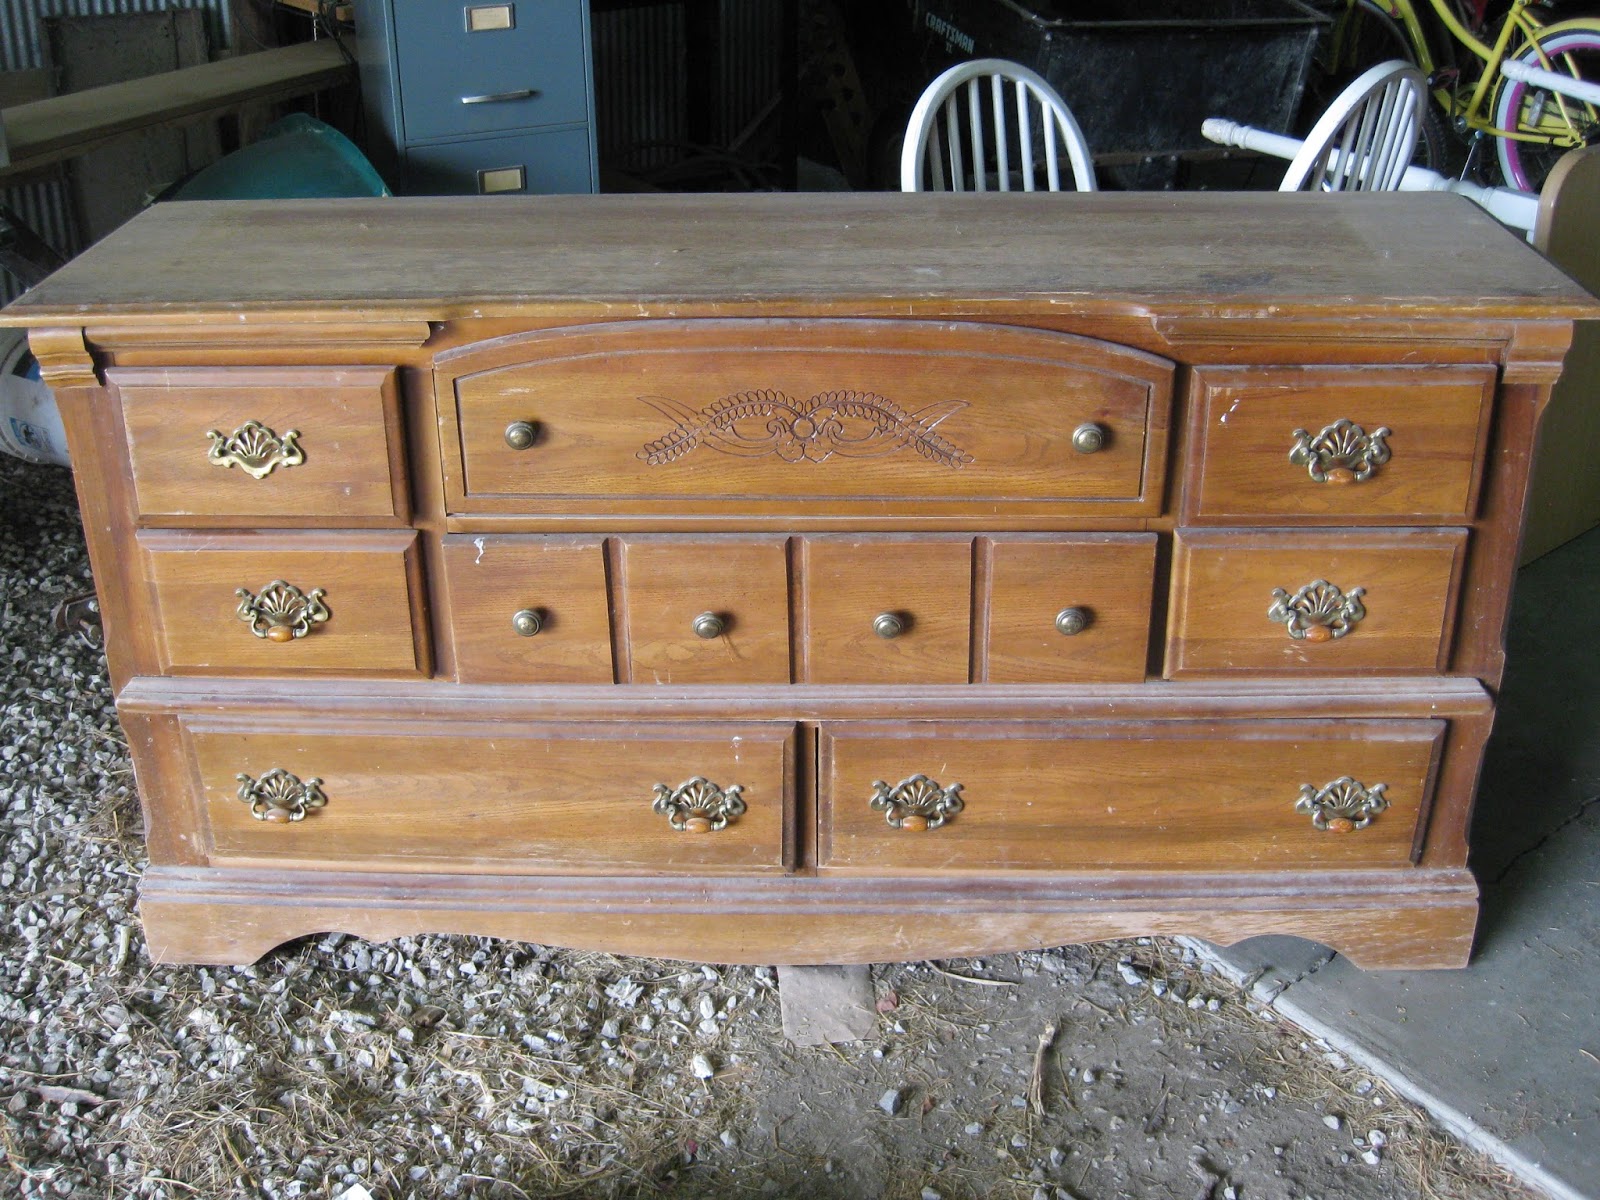
Refinished Wardrobe: Blonde to Brunette
I finally finished the wardrobe! I am beyond excited about how it turned out. I may or may not show off pictures to anyone, anywhere. Eek!
Let me start off by saying I have never stained or done woodwork of any type. (I have painted a couple pieces.) I have observed Paul or his dad or grandpa working on projects, but even that exposure has been limited. And I chose this project as a trial run. Heh. Nothing like taking on something small to see if I can do something!
And I am going to point out that Paul didn't help with this project. At all. I asked him later, after I was finished, why that was. I didn't know if he was being a jerk, or being like a good parent - standing back and making me do it on my own. He said it was more of a matter of he had no idea what I was envisioning, so he just let me do my thing.
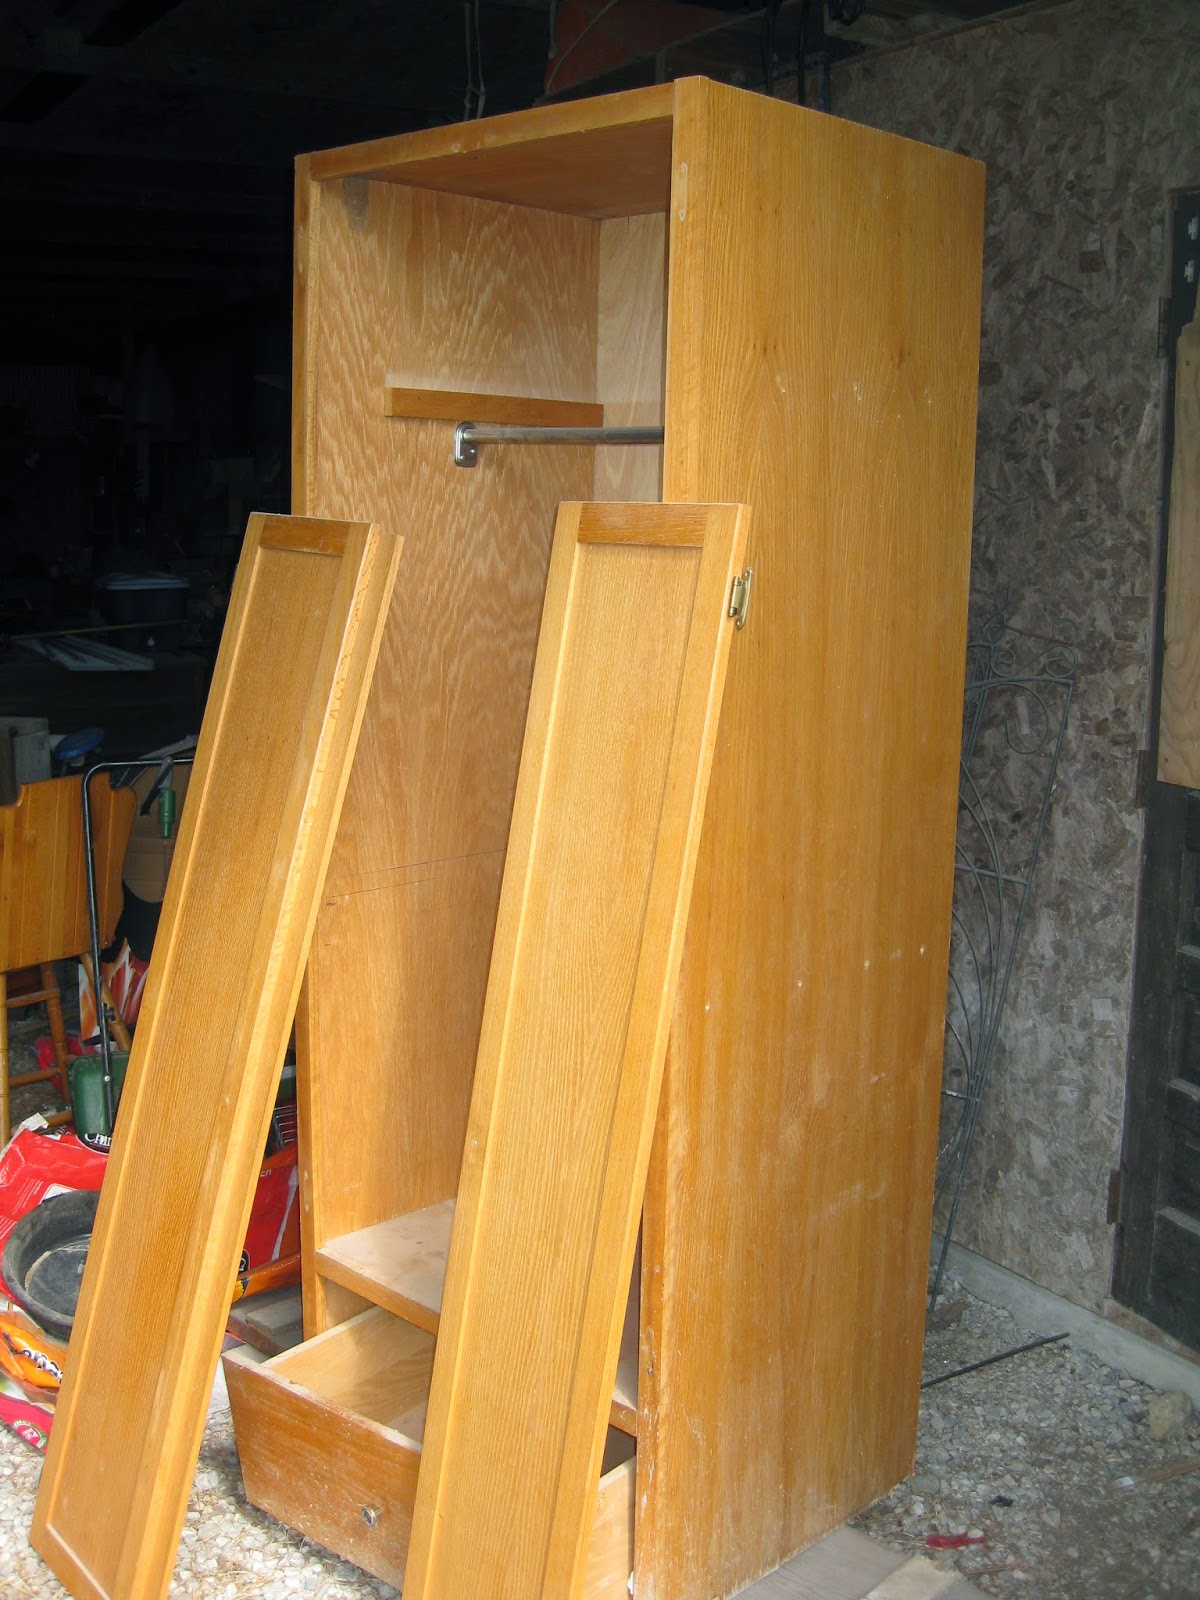
So, the history of this piece, is that a neighbor/friend of my parents' custom built it for my older sister's room, I'm going to guess about 1995. Mom said they told him the measurements they needed, and the price they could pay, and this is what he built. I have no idea what it's made out of - I'm assuming maple or pine. The doors are solid, but the sides are a veneered particleboard.
I was so gung-ho to get the project started, I forgot to take good "before" pictured until after I had started dismantling it.

I didn't take a lot of pictures of the process. For one, snoring boring for you if this isn't your thing. For two, I was "in the zone" and focused on getting it done. (Babies only nap so long!)
I patched the screw and hook holes with wood putty. Then, I sanded it. I wasn’t positive how much to sand, because the finish was so close to a natural color, it was hard to tell when you were to bare wood. So I sanded it twice with an electric sander (100 grit), and once by hand. (220 grit) (Who knew: sanding can make you SORE!) Some places I sanded less (like once by hand), since I knew they wouldn’t show behind the doors. And it turns out they accepted the stain just as well, which makes me question the necessity of sanding to bare wood, but anyways…..
I did use a pre-stain conditioner. I don't know if that's really necessary, but it was recommended, and I figured I needed all the help I could get!
I used Minwax gel stain in “Hickory.” Gel was recommended since it would be stained while standing up (drip hazard). It had good reviews, but I did have some trouble with it gumming up. It still felt a bit tacky in a couple spots, even after two days between coats. (I only did two coats.) It may be because the temperature was around 90, with typical Kansas humidity, when I was doing this. When I tried to rub off the excess stain, the lint (in what I thought was a lint-free rag!) got stuck in it, especially at the end of the pieces. This really stressed me out, and I read up on what to do, and everything said “don’t sand after staining!” Normally, I’m a follow-the-rules kind of gal, but I followed my gut instinct and… I sanded it. I used a really fine steel wool, and it wasn’t sanding, so much as petting those areas with the stuck-in lint. It seemed to knock out the lint fibers and felt much smoother prior to adding the clear coat.
I used Minwax Semi-Gloss Polyurethane for the clear coat. I used 000 steel wool between coats, and buffed it down good (because this is what Google said to do!). The can recommend three coats, but I only did two. It's not like a kitchen cabinet, that would get lots of use and abuse!
I knew I wanted a cup pull for the drawer. I had to go to 3 hardware stores in town to find one that had any, and of course they only had it in silver. But I was not going out of town to hunt for this one thing. Another reason I decided to spray-paint the hinges and knobs - ensuring everything matched!
And the final result:

The staining is slightly uneven, but I think it gives is a rustic, antiqued look. There are imperfections. But it’s things that only would bother me, and it turns out, I am not even really bothered by them, in my love for the overall result.

So, once more.....
Now I can't wait to get started on my next project.......
Let me start off by saying I have never stained or done woodwork of any type. (I have painted a couple pieces.) I have observed Paul or his dad or grandpa working on projects, but even that exposure has been limited. And I chose this project as a trial run. Heh. Nothing like taking on something small to see if I can do something!
And I am going to point out that Paul didn't help with this project. At all. I asked him later, after I was finished, why that was. I didn't know if he was being a jerk, or being like a good parent - standing back and making me do it on my own. He said it was more of a matter of he had no idea what I was envisioning, so he just let me do my thing.
So, the history of this piece, is that a neighbor/friend of my parents' custom built it for my older sister's room, I'm going to guess about 1995. Mom said they told him the measurements they needed, and the price they could pay, and this is what he built. I have no idea what it's made out of - I'm assuming maple or pine. The doors are solid, but the sides are a veneered particleboard.
I was so gung-ho to get the project started, I forgot to take good "before" pictured until after I had started dismantling it.
 |
| My sister had later added an interior shelf (note the screw holes) and exterior hooks. (I had already removed them at this point.) |
 |
| The backing had come loose almost completely. (I guess Paul did help out on this: he nailed it back on with finishing nails right before we moved it into the final place in our room.) |
 |
| There was some water damage along the bottom. I didn't worry about this too much, because I knew it could be covered with a piece of trim. |
I didn't take a lot of pictures of the process. For one, snoring boring for you if this isn't your thing. For two, I was "in the zone" and focused on getting it done. (Babies only nap so long!)
I patched the screw and hook holes with wood putty. Then, I sanded it. I wasn’t positive how much to sand, because the finish was so close to a natural color, it was hard to tell when you were to bare wood. So I sanded it twice with an electric sander (100 grit), and once by hand. (220 grit) (Who knew: sanding can make you SORE!) Some places I sanded less (like once by hand), since I knew they wouldn’t show behind the doors. And it turns out they accepted the stain just as well, which makes me question the necessity of sanding to bare wood, but anyways…..
I did use a pre-stain conditioner. I don't know if that's really necessary, but it was recommended, and I figured I needed all the help I could get!
I used Minwax gel stain in “Hickory.” Gel was recommended since it would be stained while standing up (drip hazard). It had good reviews, but I did have some trouble with it gumming up. It still felt a bit tacky in a couple spots, even after two days between coats. (I only did two coats.) It may be because the temperature was around 90, with typical Kansas humidity, when I was doing this. When I tried to rub off the excess stain, the lint (in what I thought was a lint-free rag!) got stuck in it, especially at the end of the pieces. This really stressed me out, and I read up on what to do, and everything said “don’t sand after staining!” Normally, I’m a follow-the-rules kind of gal, but I followed my gut instinct and… I sanded it. I used a really fine steel wool, and it wasn’t sanding, so much as petting those areas with the stuck-in lint. It seemed to knock out the lint fibers and felt much smoother prior to adding the clear coat.
I used Minwax Semi-Gloss Polyurethane for the clear coat. I used 000 steel wool between coats, and buffed it down good (because this is what Google said to do!). The can recommend three coats, but I only did two. It's not like a kitchen cabinet, that would get lots of use and abuse!
 |
| This is when I started to get excited - nigh unto giddy. All that was left was the trim board between the doors. |
Now.... What to use for hardware? I knew I didn't want the tacky brass that had been on it. So, now... Buy all new, or.... Spray paint?
 |
| Original brass, "Oil Rubbed Bronze" (left), and "Anodized Bronze" (right, which I already had). |
 |
| Oil Rubbed Bronze is the winner! And I think I'm going to leave the screws. I kind of like the contrast. Weird, considering I'm OCD. But I'm also lazy, and painting those things? No thanks. |
I knew I wanted a cup pull for the drawer. I had to go to 3 hardware stores in town to find one that had any, and of course they only had it in silver. But I was not going out of town to hunt for this one thing. Another reason I decided to spray-paint the hinges and knobs - ensuring everything matched!
 |
| I did this little trick I saw somewhere online - photo copied the screw holes and used the paper as a guide - worked perfectly! |
 |
| My photography, however, leaves a lot to be desired....... |
 |
| Love, love, LOVE! |
 |
| Obviously, this is Paul's "closet." |
 |
| The knobs don't exactly match. And I messed up the finish on one because it apparently wasn't quite dry when I installed it. And the holes aren't even. (That last one is not my fault. Pre-existing condition.) |
 |
| I wasn't really that careful on the interior. |
 |
| The unfinished wood shows at the bottom under the drawer. |
 |
| But the water damage does not! No trim needed. |
BEFORE:
|
And..... AFTER:
Love! For someone who had absolutely no idea how to do this type of stuff..... I thought it turned out pretty dang good! I thank Google for my education. :)
Total cost:
Wardrobe: free
Wood conditioner: $12 (barely used any)
Stain: $12 (used half a quart)
Polyurethane: $33 (used maybe 1/8 gallon)
Drawer pull: $7
Spray paint: $7 (again, hardly used any)
TOTAL: $67 - Not bad at all!
|
Now I can't wait to get started on my next project.......
Monday, June 9, 2014
Happy Birthday to Zadie......
......two months later......
Happy Birthday to you!

On a side note: This year I decided I'm done with traditional birthday cakes. We don't like cake, apparently. The boys get all excited about me making one, and then after the party, the rest of it sits on the counter for a week until I throw it out. What's the point of putting effort into something we don't like? So Zadie got a raspberry dump cake. (Which, incidentally, wasn't as awesome as it sounded. Should have stuck with peach.)
Even Superwoman Can't Do It All
This past weekend, I finished re-finishing a wardrobe, and I canned over 70 pints of jellies (pear honey, plum, and "plumple") from juices in the freezer. Feats of a Superwoman, am I right?
Or not.
You should see the house. It is a huge pile, from one end to the other. Laundry, toys, trash, mail, laundry, fans (it's been cool enough to turn off the a/c), school books, shoes, laundry, cleaning supplies, laundry......
(I may be a bit behind on the laundry......)
But all these Super Heroes have a butler to do their housework, so I don't feel too bad.
Not that I'm an obsessive person (cough, cough), but I got a wardrobe from my parents that they had built for my sister's room..... 20 years ago? (No way.....) It has been in their garage for the last 6 or 7 years, and since we'll be losing a closet in our room, we are suddenly needing space for hanging clothes. We brought it home last Thursday, and I got it sanded down, re-stained, and 2 coats of polyurethane on it in a week. All I'm needing is some hardware and someone willing to help Paul carry it inside. (I call pansy on this. I don't want to be the one responsible for dinging or scratching it.... Much easier to forgive someone else than myself.) It wasn't even on my radar to do it, but it gave me an excuse to avoid housework, so I've been working on it every free chance I get.
So here's a sneak peek:


These three have been eating outside a lot. Mainly because they can't find the dining room table under the pile. But I thought they were just too cute all lined up on the bench.

We had a round of illness go through the kids last week. I took this one because Jacob got red "freckles" from throwing up. I feel so bad, his face breaks out in these tiny broken blood vessels every time he pukes.
So that was a little gross back story to a picture that will steal your heart.
Gideon got to taste his first sweet corn. Even before he had actual baby food. He got very in to the corn cob......

And look what I taught these guys to do! I'm looking forward to the day I can get all four of them in there after supper, and then I can just sit on my backside, eat chocolates, and work on my needlepoint. (Ha ha.) I did find out that putting on big band swing music is an effective motivator, though.
This one steals my heart every day with those big eyes and long eyelashes. And the pigtails just kill me!
Nathan and Zadie are really in to music. I don't even remember what song was on, but they decided they needed to dance. Note they even have "dancing shoes" on......


Okay, so I didn't plan on posting all of those pictures, but there you have them. A little glimpse of our lives and how the kiddos are growing!
Or not.
You should see the house. It is a huge pile, from one end to the other. Laundry, toys, trash, mail, laundry, fans (it's been cool enough to turn off the a/c), school books, shoes, laundry, cleaning supplies, laundry......
(I may be a bit behind on the laundry......)
But all these Super Heroes have a butler to do their housework, so I don't feel too bad.
Not that I'm an obsessive person (cough, cough), but I got a wardrobe from my parents that they had built for my sister's room..... 20 years ago? (No way.....) It has been in their garage for the last 6 or 7 years, and since we'll be losing a closet in our room, we are suddenly needing space for hanging clothes. We brought it home last Thursday, and I got it sanded down, re-stained, and 2 coats of polyurethane on it in a week. All I'm needing is some hardware and someone willing to help Paul carry it inside. (I call pansy on this. I don't want to be the one responsible for dinging or scratching it.... Much easier to forgive someone else than myself.) It wasn't even on my radar to do it, but it gave me an excuse to avoid housework, so I've been working on it every free chance I get.
So here's a sneak peek:
Not gonna lie..... Pretty dang pleased with the results.
The weather has been perfect the last few days, so we've enjoyed lots of outside time. This one got to spend time on the blanket, enjoying the sights and sounds of the outdoors.
 |
| And practicing sitting up! |
 |
| Oh! My! Goodness!!! |
So that was a little gross back story to a picture that will steal your heart.
 |
| Can you say "puppy dog eyes"? |
Gideon got to taste his first sweet corn. Even before he had actual baby food. He got very in to the corn cob......
And look what I taught these guys to do! I'm looking forward to the day I can get all four of them in there after supper, and then I can just sit on my backside, eat chocolates, and work on my needlepoint. (Ha ha.) I did find out that putting on big band swing music is an effective motivator, though.
 |
| Incidentally, I'm pretty sure this was the last time the kitchen got fully cleaned. |
This one steals my heart every day with those big eyes and long eyelashes. And the pigtails just kill me!
 |
| What's that? You want a pony? Okay! |
Nathan and Zadie are really in to music. I don't even remember what song was on, but they decided they needed to dance. Note they even have "dancing shoes" on......
 |
| Oh, that's what the living room looks like when it's clean! I'd forgotten! |
Here's a couple of the ten million selfies our oldest has taken of himself. Every time I go through pictures on the camera or my phone, there's ones of himself and his toys.
 |
| This one he requested that I take of him dressed as an "army" (soldier). |
 |
| Sleeping in just looked like so much fun! |
Sunday, June 8, 2014
Overheard:
"There will be blog."
-JC Eichenberger
(Much better than my, "I am so blogging about this!")
-JC Eichenberger
(Much better than my, "I am so blogging about this!")
Subscribe to:
Posts (Atom)